Helpful additions to forms and timelines in Dynamics 365 CRM
We’re always watching the latest and greatest changes coming to the Dynamics 365 suite to see how they can benefit our users. Lately, there have been a few helpful shifts regarding the timeline and forms within Dynamics 365 CRM apps that allow for better workflow and easier management of what you’re doing within the system. Although these features aren’t brand new—they are generally available and your administrator or partner can help get you started with them whenever you want—but we’re highlighting them since they may not be on your radar.
Like getting the latest updates on your system’s new features?
EDIT RELATED TABLE RECORDS FROM ANOTHER TABLE
The Form component control allows you to edit data from a related table record right within another table’s form for lookup fields. This can allow you to do things like edit the primary contact record from an account form, without having to open up the contact record itself to do so. This is going to save you time navigating around the system while also keeping you on track – it’s a pretty common experience to have to navigate away from a page to complete a quick task that is related to the one you’re currently working on, then forget what you were doing just a moment before.
You can add the record onto the main form you see when opening a record, or even create a custom tab for this purpose – whatever suits your needs!
Courtesy of Microsoft.
Courtesy of Microsoft.
USE THE MAIN FORM TO VIEW OR CREATE RECORDS FROM A LOOKUP FIELD
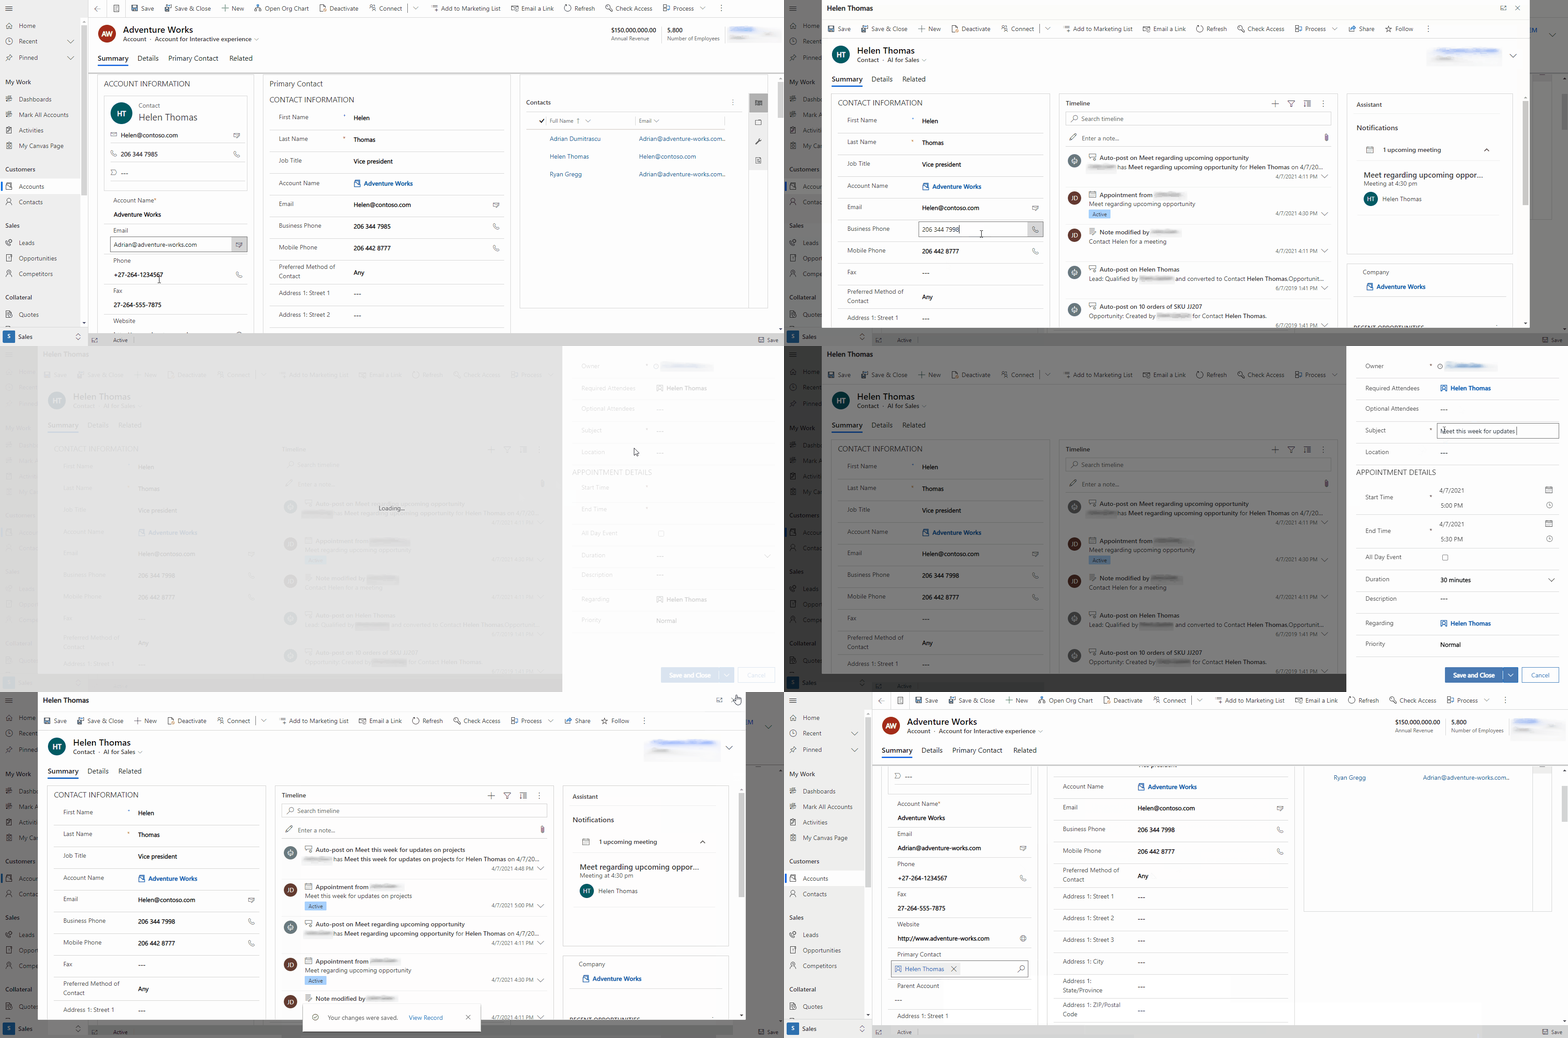
When you’re working in a record, you can create a new record or view/edit a record in a lookup field on the related record. For instance, say you’re working within a contact record that doesn’t have an associated account yet, but you want to make one now. No problem—you can select the Account field, click the magnifying glass, and select “New Record.” From there, depending on the settings within your app, the new record can open in two ways:
Quick create via a side panel with a paired down selection of key fields. This allows for a fast creation of the record while very obviously signifying it as a “side task” in front of the primary task you’re working on and will quickly return to.
A main form dialog that opens as a popout window in front of the record you opened it from. This window encompasses most of the screen, but once you save and close that new record, it will close and return you to the record you were on before, which never closed and was always right there, behind the scenes.
Courtesy of Microsoft.
Each of these options create a hyperlink to the new record right in the field. Editing and creating new records this way varies from the standard way a new record would open in D365 from within a lookup field, which is just to completely move away from the contact record to the new account record. Why does this matter? It’s a lot harder to stay in the flow of your work when you’re sent away from a task and need to navigate back. How easy would it be to forget that you were doing in that contact record in the first place, after being sent away to create the account record?
“Quick create” and “main form dialog” are settings that a system admin can turn on within Power Apps and set on an entity level, including the option to choose to allow users to grant users edit access in existing records or to create new records entirely. (And one more thing: at least for now, you can “Quick create” on grids but you cannot yet open a dialog—with subgrids, you still have to open that new record and leave the current record. But hopefully this will be added to the feature soon!)
CREATE AND OPEN ACTIVITY RECORDS STRAIGHT FROM A RECORD TIMELINE
Now, concerning your timeline on Lead, Opportunity, Account, Contact, and any custom entities, you can now set the timeline control so that you can create and/or view activities right from the timeline via the main form dialog. This is an excellent addition because, although the “Quick create” function is very useful, it doesn’t show the entire record and you cannot complete the activity there, so you will find yourself navigating away from your current record to both see the full activity details and also complete that activity. But the main form dialog option will allow you to not only create and see all the activity data, but also complete it—no more having to hit that back button!
Courtesy of Microsoft.
You can specify the Activities that you want to have these abilities, what fields you want to populate when you create an activity from the timeline, and remove any activities that your team does not use or need. For instance, most companies will want to use Tasks and Appointments, but Faxes are no longer a regular part of many workdays, so you may choose to omit that activity. Or if you don’t use your CRM for marketing at this point, marketing campaign activities are not needed either. Removing moot activities from the timeline is a great (and easy) way to declutter and make your system more customized for your team’s needs.
The two options you will need to set are held within the Timeline settings in Power Apps. In this space, you will set the “Create activities using” and “Open activities using” options for any and all activity types that your organization will need.
Interested in using any of these features? Your admin or partner can help you get them turned on in your system. And if you could benefit from a dedicated training session to become more familiar with your CRM, we can help with that, too. Just get in touch with us.


