
Creating Real-Time Segments in Dynamics 365 Customer Insights-Journeys

A segment is a way to group leads, customers, or a targeted audience into a structured grouping based on key characteristics and attributes. This makes it easier to target specific groups of people with a more strategic and personalized type of marketing across campaigns and channels.
You wouldn’t send a long-time customer a marketing email designed for new prospects; the same way you wouldn’t send Chicago-based material to someone who lives in Minneapolis. Segments allow you to organize and break up your audience to keep everything organized.
Real-time Segments in Customer Insights—Journeys are not so different from those you may have created in other marketing applications (or, for seasoned Dynamics 365 Customer Insights users, the now-depreciated outbound area of the app).
However, the differences in the designer canvas, paired with the overall differences to consent in Real-Time Marketing, made us think a brief tutorial was in order. So, without further ado, let’s discuss how to create a new audience segment that you can use within your customer journeys.
Creating a New Segment

Main segment dashboard
Once ready to begin a new segment, go to the Segment section under Audience in Dynamics 365 and select “New Segment”. You will then be prompted to create a new segment name and select your target audience from the two options, “Contact” or “Lead.”
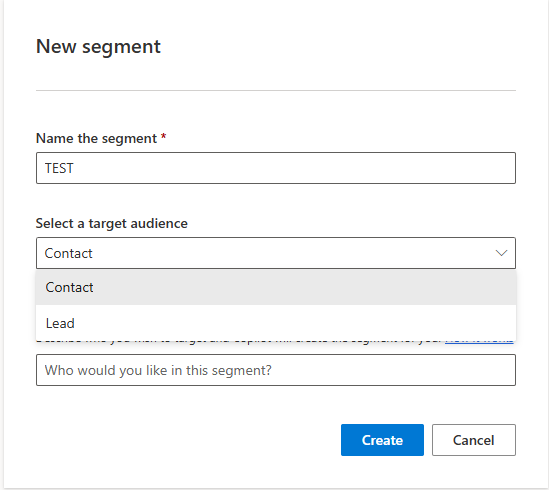
Create a new segment
Groups
Once your new segment has been created, you will be brought to a blank canvas where you can begin to create your groups. A group is how you break your audience into buckets based on shared characteristics or behaviors. These groups allow you to define specific criteria like demographics, engagement, transactional data, and more to help tailor your messaging and campaigns.
You can have multiple groups within a single segment following different attributes, depending on how narrow or wide you want your target audience funnel to be. You can also create subgroups rather than a separate group, which will work in the same way.
Let’s look at how each type of group works.
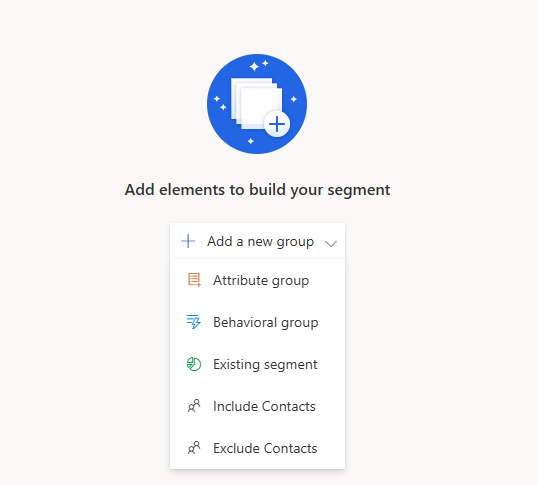
Group options when creating a segment
Attributes Group
An attribute is essentially demographic data (qualities that the audience member has or that they are, such as age, their city or state, their annual income, and so much more) a group uses to filter your audience into your segments. You can add multiple attributes to one group, or you can have multiple groups with different rules.

Adding attributes to groups
Setting an attribute for your group is easy. First, once your group is created, you will see a conditional panel on the right-hand side of your screen that says “Attributes.” This panel and its options will adjust based on the type of group you have created. In this panel, choose from or search within a large list of how you want your group to filter your audience.
We recommend exploring all the different attribute options so you know just how deep your toolbox can get.

Attributes list
When choosing your attribute, the most straightforward options will be to pull from the same category/table you originally selected, whether it was “Contact” or “Lead”. However, more complex segment requirements may require you to pull from a related table.
For instance, you can filter your contact audience by information associated with it through an event they attended (like an event registration, which is a separate table), or the account they are associated with (another separate table). This provides a lot of flexibility in sifting through your audience members to get precisely who you want, but adding attributes from related tables is a little more complex, so check out Microsoft’s Documentation on this so you can be sure you’re selecting the right ones.

Adding an attribute to your existing or new group
Once you pick your attribute out, you need to set the condition. You will see the attribute you selected, and next to it, there will be a dropdown menu and a place to “Enter Value.” In the dropdown menu, you can select options like is, is not, contains, and more—these options change based on the attribute itself. You would then enter the values to set your conditions—again, based on the attribute, you may have a prefilled set of options to choose from or you will fill-in-the-blank short text box. An example is “City Is Minneapolis” to choose a segment group of people who only live in Minneapolis. To add this query, you will find the “Address 1: City,” then select “is” as your filter, then type “Minneapolis.”
Note that any time you type an attribute, it must be spelled correctly, or it won’t pull in your desired contacts. In addition, if the city name is not one of a kind (for instance, you want “Portland, Oregon,” but there’s also a “Portland, Maine”), and you want to specify a specific city, you will also want to add another attribute to further filter your audience—in this case, you’d want to add a query that says “State Is Oregon.”

Attribute parameters
You can continue adding attributes and parameters until you feel you are targeting the right audience for your needs.
These groups and attributes will be connected through terms like: Or, and Also, But Not, etc.
“And Also” narrows your filter by requiring an audience to meet each of the attributes to be included in the segment. For example, maybe you are searching for people living in Minneapolis who are also over the age of 18. In this case, I may use a field called “Is Minor” and set it to “No.”

Groups interacting with each other using the “And also” function
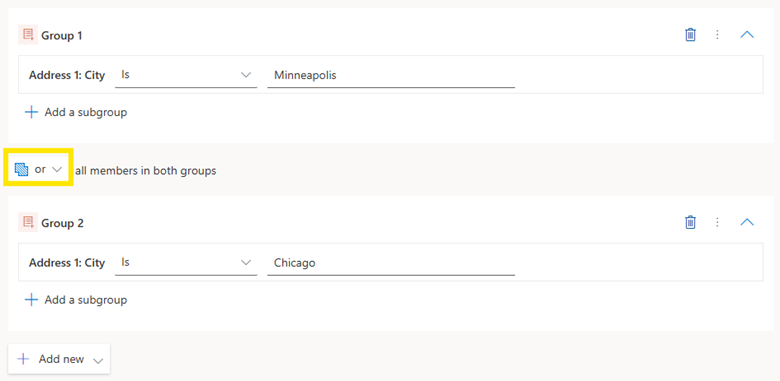
“Or” widens the filter by allowing the audience to meet at least one of the attributes in the segment. For instance, you can target people living in Minneapolis OR Chicago by including both cities with the connector “or”
Groups interacting with each other using the “or” function
“But Not” excludes members who have the following attribute. For instance, perhaps you want to search for citizens of Minnesota, but you want to omit a city—say, Minneapolis, because you will be sending them a more tailored message. You can do that too.
Once you are set with your ideal segmented audience, you can hit the “Ready to Use” button in the top right corner, and your segment will be set. You can go back in to edit, delete, or copy your created segment at any time. Creating a copy of a previously created segment can help you save time by giving you a starting place to make a similarly structured segment.

Groups interacting with each other using the “But not” function
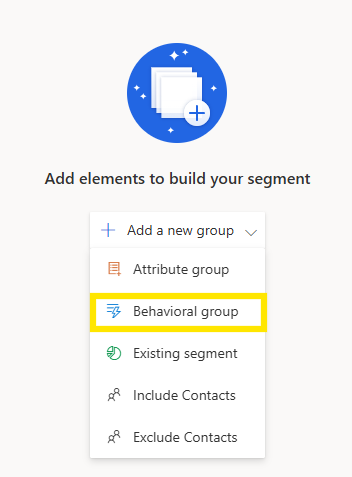
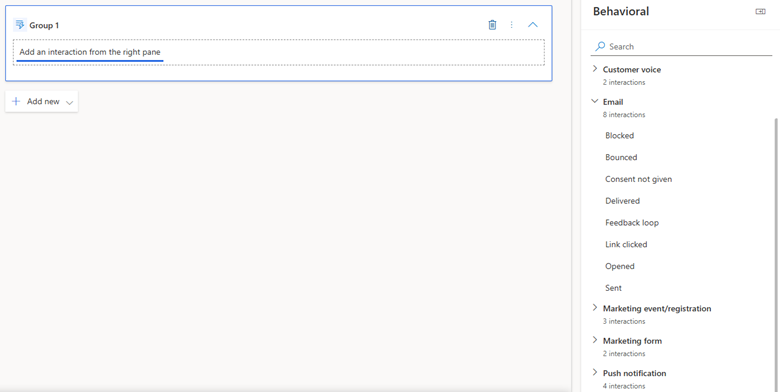
Behavioral Group
Another way to segment your audience is by behavioral grouping (or things they’ve done), instead of attributes. This means that your audience will be funneled by characteristics such as engagement on marketing journeys. You can set up a behavioral group based on whether a person clicked the link in your marketing email, whether the email was delivered, and even if consent was given. This can help you with your strategy by implementing follow-up messages for people who clicked your link, sending them more information on the topic. You can also use this to filter out the people who did not consent by ensuring they are not included in further marketing material to keep your sender’s reputation high.
To learn more about sender reputation and marketing emails, dive into our blog discussing this in depth. The behavioral groups do not just apply to emails, but all of your marketing channels, including SMS, push notifications, and more.
Behavioral group option when creating a segment
You can set up a behavioral group based on whether a person clicked the link in your marketing email, whether the email was delivered, and even if consent was given. This can help you with your strategy by implementing follow-up messages for people who clicked your link, sending them more information on the topic. You can also use this to filter out the people who did not consent by ensuring they are not included in further marketing material to keep your sender’s reputation high.
To learn more about sender reputation and marketing emails, dive into our blog discussing this in depth. The behavioral groups do not just apply to emails, but all of your marketing channels, including SMS, push notifications, and more.
Behavioral options when creating a group
Other Groups
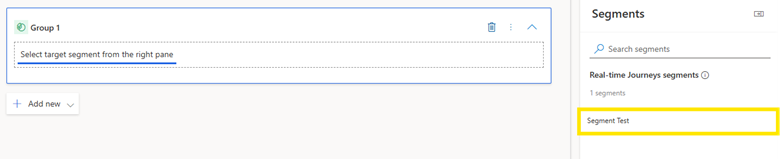
There are a few other ways to build segments, and these are to use already existing segments, or include/exclude specific contacts.
First, you can add existing segments to your new segment. This will pull from a group of individuals you have already categorized from your previous segments, your Journeys, or customer insights data.
Creating a segment from your other existing segments is really useful when you find yourself targeting the same few segments in some of your journeys, but you still need the individual segments for other outreach. For instance, say you send a monthly newsletter to leads and current clients. In this case, you could combine several segments into one “Newsletter Recipients” segment. But, since you will also need the ability to send separate communications to these groups, you would also retain those separate segments.

Other group options
Segment test function
Second, you can simply add or exclude individual contacts in the segment. When creating a new group, all you would need to do is select either “Include contacts” or “Exclude contacts”; from there, you can select individuals you want to include in your audience funnel.
This is particularly advantageous for one-off communications when you know precisely who you want to target--or not target--and it’s not too long a list. (And for those who have used the outbound area in the past, this is a good substitute for the “Send now” email feature from outbound, which, while available in Real-time Journeys, does require you to select from already-created segments.)

Include members function
Query Assist
Another tool that can be useful while setting up your segments is Query Assist. AI is being used in our daily lives, and business needs more each day. That is exactly what Query Assist is! Query assistance is an AI tool that helps you create a segmented audience based on the natural language prompt you put in. It’s as simple as typing in that you want a group of “people under the age of 40 who live in Minneapolis, Chicago, and Milwaukee,” and the AI will create a group with the attributes you are looking for. Observing what the AI helper creates for you can help you learn and understand how to create these segments. This can also save time if you try to finish something quickly.
Keep in mind that the AI features are new and continually evolving, and so at the time of this blog’s publication, there may be some kinks that need working out. And, as always, AI populated work should always be double-checked.

Query assist function
Estimating your segment membership
You can also utilize the estimate tool in the bottom left-hand corner to estimate how large your target audience is based on the groups you created and see the included members. This way, you can tell how wide or narrow your audience funnel is to better support your marketing needs.

Audience estimation tool
Settings
In the settings panel, you will also be able to choose which refresh option you would prefer. The refresh rate can either be automatic or static, meaning if it is automatic, then your segment will routinely update when new contacts or leads are added, and they are automatically filtered either in or out of your audience funnel. With a static snapshot option on, you will need to manually refresh every time you get a new audience contact or lead so that they can be properly filtered through the funnel into the correct segment.

Segment settings
Creating detailed audience segments is a great way to make your marketing more strategic and tactical. Now that you know how to set this up, you can determine the best way to communicate with your audience. You can sort them by new customers, demographics, or other attributes.
If you want more information on this, we have a Fast Class dedicated to Real-time segments that you should check out!