It’s a new year: Make the most of a fresh start in Dynamics 365 Customer Insights – Journeys
The start of a new year is always a great time to home in on your goals and to-do list. If your New Year’s Resolution is to make data-informed decisions that steer your marketing strategy, then decluttering your marketing application to achieve clean data and clearer KPIs is a good place to start.
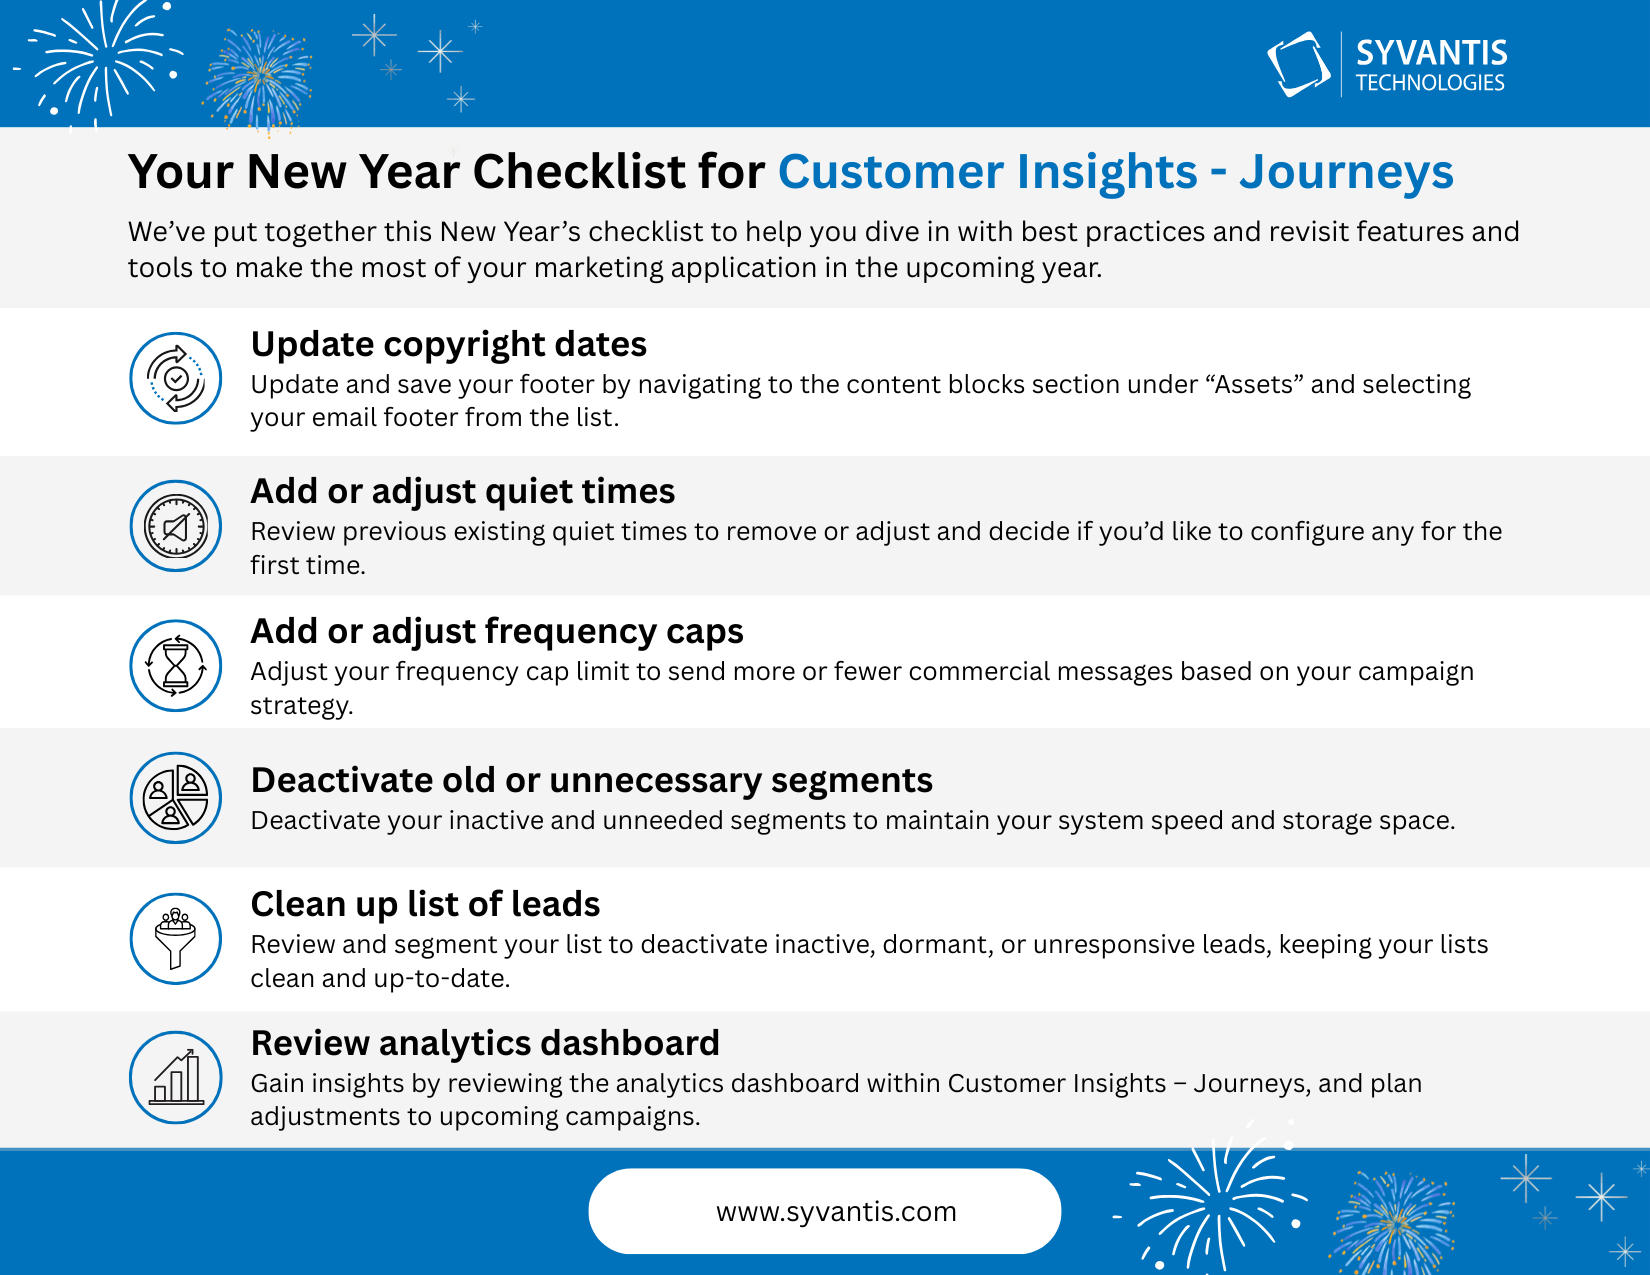
If you’re using Dynamics 365 Customer Insights – Journeys, we’ve put together this new year’s guide to help you dive in with best practices and to revisit features and tools to help you make the most of your marketing application.
Updating copyright dates
Starting off the to-do list is updating the copyright date in the footer of your email content blocks. This is a quick update but can be easily overlooked when considering the bigger tasks that come with a new year.
In Customer Insights – Journeys, this can be done by navigating to the Content blocks section under “Assets” and selecting your email footer from the list. You can make your update, save, and your footer is ready to be used in your upcoming email sends.
For any emails that may have been created and sent out last year but will still be used in active journeys, be sure to double-check any copyright footer content blocks and update any time-sensitive content. Remember that content blocks are not dynamic once they have been placed in an email design; so, make sure you remove and re-add any updated content blocks in each already-created email to see those changes roll through.
Hint: be sure to update the copyright date on your website, too!
Enable and set up quiet times
Enabling quiet times allows you to control when your audience receives your messages by applying time zone-specific restrictions, setting up specific dates and/or times where messages won’t be sent out. Quiet times can be accessed in the Settings area of the app, then by navigating to Quiet times in the “Customer engagement” section.
You can set up quiet times on the journey level, allowing you to set the specific times and days that messages in your journeys will go out based on the time zone that the journey is set to. You can also set up quiet times on the audience level, using the time zone for each contact, lead, or contact-point record.
Now is a good time to revisit any existing quiet times or decide if you’d like to configure any for the first time. Or, you can decide to look into the advanced quiet time settings to get even more specific across different attributes.
General quiet time settings allow you to apply a rule across a single geographical area, or if you have one blanket quiet time rule across your entire audience. For example, you could have one quiet time rule for the US region, with the rules set here applying to anyone in this region.
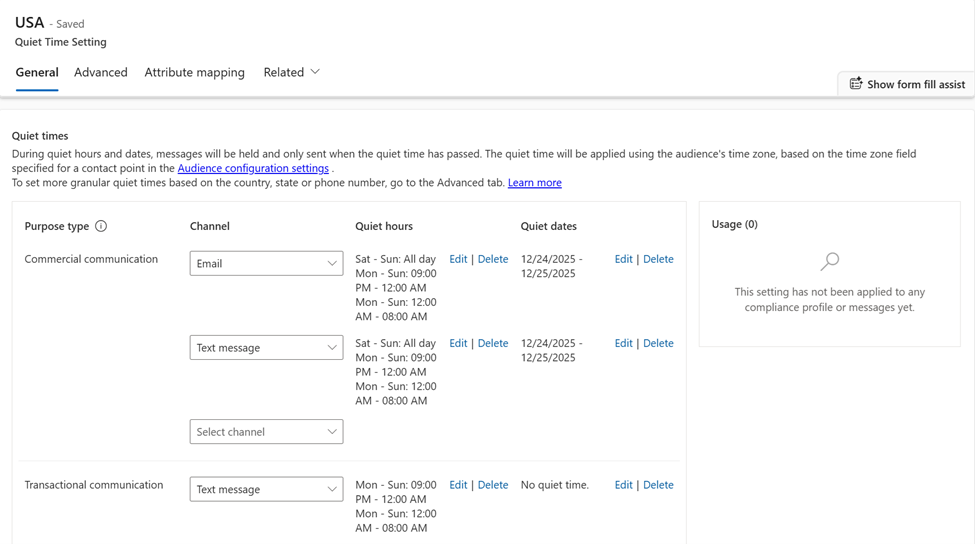
Quiet time settings for the USA region. Image courtesy of Microsoft.
Advanced quiet times settings allow you to apply rules across different contact or lead record attributes, like country/region, state/province, and phone number. These advanced settings add additional rules to the general settings, meaning that within the US region, you can also set up separate quiet times for Texas and Alabama.
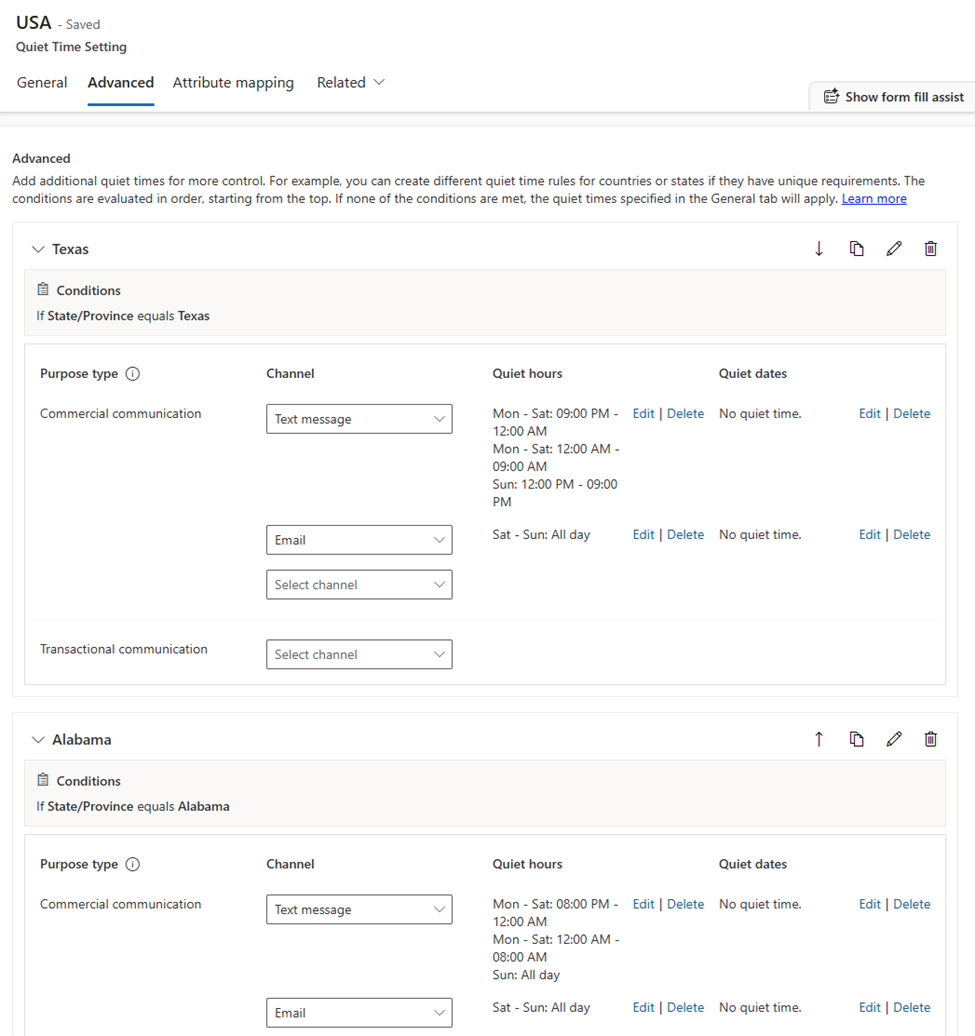
Advanced quiet times for state/province rules. Image courtesy of Microsoft.
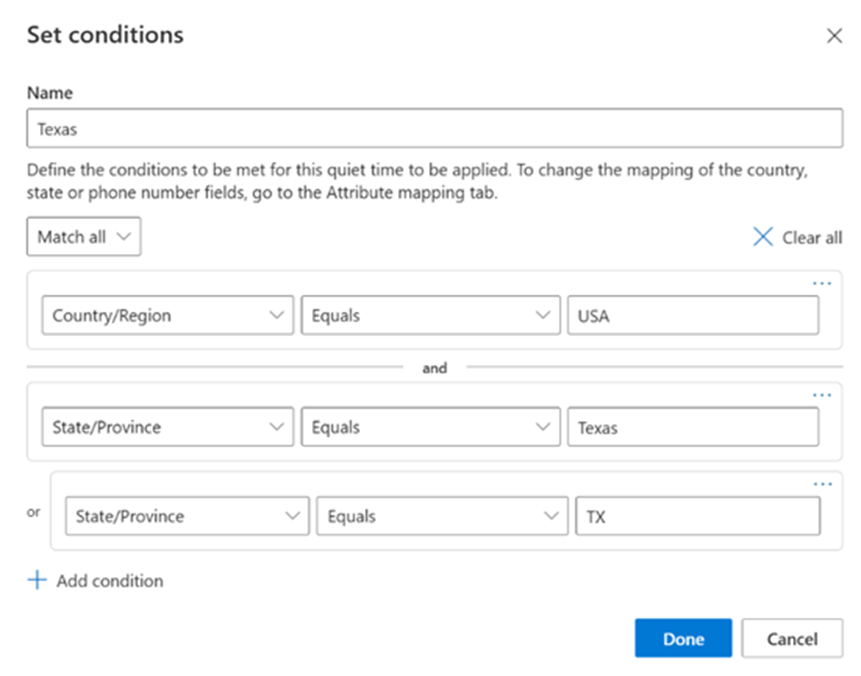
Adding conditions for advanced quiet times settings. Image courtesy of Microsoft.
Note that when there are multiple sets of quiet time settings at play, they are applied on a top-down basis, meaning the first matching rule is applied, and if no rules match, then the general quiet times will be applied.
Add or adjust frequency caps
The frequency cap feature lets you set a limit on the number of commercial messages your customers receive in any given amount of time through a particular channel.
The start of a year is a good opportunity to review your frequency cap strategy and determine what may or may not be working, and how you might adjust the limit to send more or fewer messages.
Think ahead to any campaigns you might be planning this year and consider if your audience will double- or triple-dip into any of these campaigns—if so, ensure your frequency cap will allow your audience to receive the messages you intend for them to receive
Or, if you haven’t been utilizing frequency caps, you could consider setting one up! Frequency caps can be accessed in the Settings area of the app, then by navigating to Frequency cap in the “Customer engagement” section. When creating a new frequency cap, you’ll be able to manage the number of daily, weekly, and monthly commercial emails that each contact-point record is able to receive. That means that you can allow your contacts to receive more text messages than emails if you so choose.
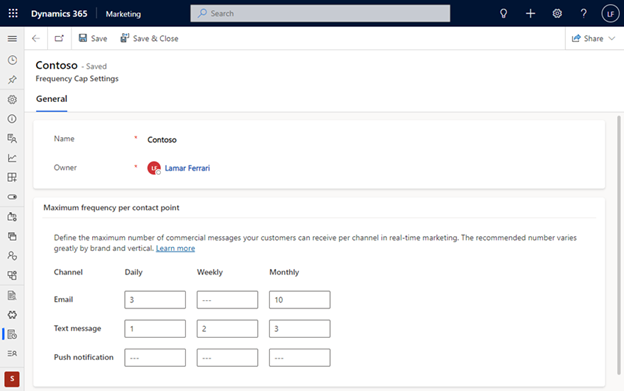
Setting up a new frequency cap per marketing channel. Image courtesy of Microsoft.
The caps count your messages on a rolling basis, meaning they are re-evaluated each time a message is sent based on the 24 hours (daily), 7 days (weekly), and 30 days (monthly) immediately leading up to the current time. If a cap is reached, then the message will be blocked and will not be sent to your recipient. However, if the blocked message is part of an active journey, then your recipient will still be pushed further down the journey and can receive any future messages within the journey.
Hint: using frequency caps in tandem with quiet hours gives you control over how many messages are sent to your audience and when they can receive them. It’s a good idea to think about how you’d like to mix and match these rules!
Note that quiet times and frequency cap settings are independent settings, so if a message is held for quiet times, the system will evaluate the frequency cap when it releases the message from the quiet times hold.
Frequency caps are applied on a per-journey basis, meaning that when setting up a new journey you can choose to apply frequency capping rules, or omit this journey from a frequency cap and the messages that are part of the journey will not go against the cap count. To apply a frequency cap to a journey, open up the journey settings using the gear icon.
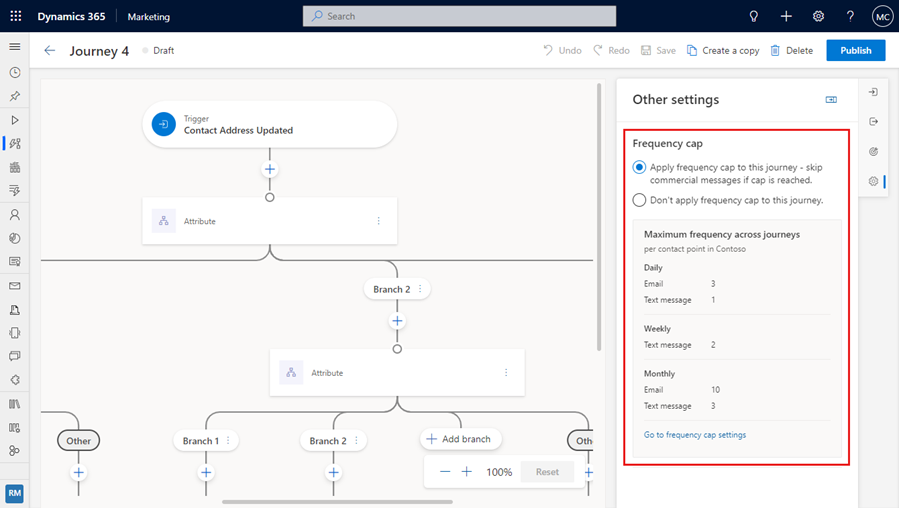
Apply frequency caps to journeys within the journey settings. Image courtesy of Microsoft.
Deactivate old or unnecessary segments
Customer Insights – Journeys limits you to 13,000 total segments (3,000 dynamic segments and 10,000 static segments). But even if you don’t have anywhere near that figure, it’s still recommended to regularly deactivate your inactive and unneeded segments, especially those that are in a perpetual draft state.
Do you have any segments from several years ago that were used in one-off journeys? What about stale, static segments with unresponsive members? A little cleanup goes a long way when it comes to segments. By prioritizing up-to-date segments with active, engaged contacts, you’re setting yourself up for success with better delivery and interaction metrics, fewer unsubscribes, and hopefully, more conversions on the content you produce.
Plus, there’s no reason to keep unused segments that just sit and collect digital dust. When your segments reach the thousands, or even hundred-thousands of members, you may not realize how much data storage these take up, so even deactivating a few old segments here and there can make a huge difference in terms of system speed and storage space!
Lighten your list of leads
Lingering leads should be evaluated and segmented accordingly—and ultimately deactivated if they are inactive, unresponsive, or have gone dormant. Instead of cluttering your list of leads with dormant prospects, we recommend setting up segments that allow you to strategically retarget these individuals and repique their interest with a dedicated campaign.
Review the analytics dashboard
The analytics dashboard within Customer Insights – Journeys is a great built-in tool, but are you using to its fullest potential?
The analytics dashboard can be found under the “Engagement” area, and by default, shows an aggregate of your analytics across journeys and channels. This is an embedded Power BI tool that pulls metrics from across your journeys and channel. But just like many other tables within Customer Insights – Journeys, you’re able to filter the dashboard to slice-and-dice across the different tiles within the report.
The separate Journeys and Channels tabs at the top of the report allow you to page between two separate data sources and review your analytics across either your journeys or channels—both of which can provide valuable insights that paint a more complete picture of your overall marketing results.
Learn more about the analytics dashboard in Customer Insights – Journeys →
You can use this dashboard to review the performance of your year-end campaigns and plan for any adjustments to journey execution for planned upcoming campaigns.
This is another opportunity to reflect last year’s successes, note areas for improvement, and set goals for the upcoming year. With Customer Insights – Journeys, a little reflection, strategizing, and tidying up can go a long way when it comes to setting yourself up for another year of data-driven marketing!
If you could use assistance with your marketing strategy, execution, and usage of Customer Insights – Journeys, the team at Syvantis can help.